Content development is the A-to-Z process of planning, creating and publishing high-quality content.
In this guide, I’ll walk you through a proven content development process to save time and drive better business results.
Whether you’re working solo or have a dedicated content team.
Let’s dive in.
Contents
- Set Your Goal
- Research
- Content Creation
- Reviewing and Editing
- Publishing and Distribution
- Post-Mortem Analysis
- Improving Your Content Over Time
1. Set Your Goal
The first step in your content development strategy is extremely important:
You need to set a clear goal.
Your goal will affect how you structure, plan and design your content.
Plus, if you don’t set a goal for your content, you won’t know how well your content development strategy worked.
So you need to be absolutely clear about it.
Your goal might be to:
- Generate direct ROI through ecommerce transactions
- Drive sales leads
- Get press coverage
- Earn backlinks to help your site’s SEO
- Improve your sales team’s close rate (sales enablement)
- Get more social media followers
- Onboard new customers
- Increase user signups
- Bring in email newsletter subscribers
Or something else.
In general you should have one main goal per piece of content.
Sure, sometimes there’s overlap. The same piece of content might bring in lots of links, press coverage and sales leads.
But it’s a good idea to choose one main goal to focus on.
And S.M.A.R.T. goals are the best:
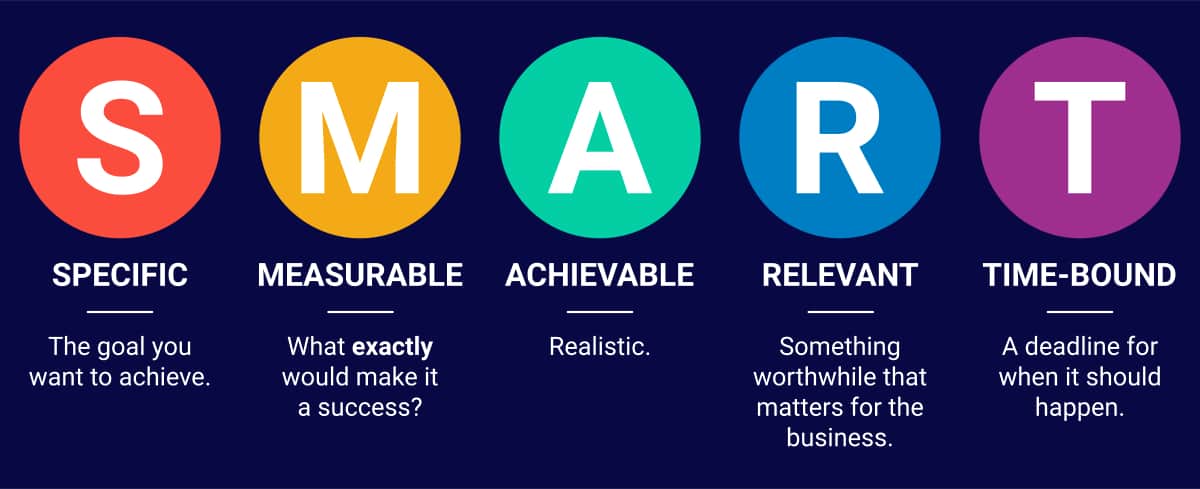
In other words, your main goal should be:
Specific: an exact description what you want to achieve. For example, a specific amount of revenue, number of external linking sites, or leads generated by the content.
Measurable: something you can measure. (“Brand awareness” is hard to measure. “Lift in branded searches” is better.)
Achievable: realistic.
Relevant: something that actually matters for the business. Like revenue, leads or sign-ups (rather than traffic alone).
Time-bound: with a deadline for when it should happen. This might be 2 weeks after publishing, or at a certain date next year.
Here’s an example of a S.M.A.R.T. goal:
“Our goal for this blog post is to bring in 5 additional qualified leads per month within 6 months.”
2. Research
Now that you’ve set a goal for your content, it’s time to figure out the best way to achieve it.
In this step, you’ll do a little research to decide on a content type, format, and approach.
For example:
If your goal is to get more backlinks, you might create an original study and publish it as an in-depth blog post or whitepaper.
While if you want to attract sales leads (or help close them), a case study could be your best bet.
And if you want to get more followers on social media, you may want to collaborate with some popular content creators.
Here are three ways to figure out what to create:
Method 1: Google Search.
This method couldn’t be simpler. Just type your topic into Google and see what comes up.
Google has been focusing more and more on “search intent” in recent years. Meaning: understanding what people really want when they search for something.
And thanks to the billions of searches Google gets each day, they’ve gotten really good at figuring that out.
In other words:
The top 5 rankings of Google will show you what kind of content people want.
So Google your topic and look for a pattern in what’s ranking in the top 5.
For example:
Every article that’s ranking on Google for the keyword “best social media tool” is a list comparing multiple tools.
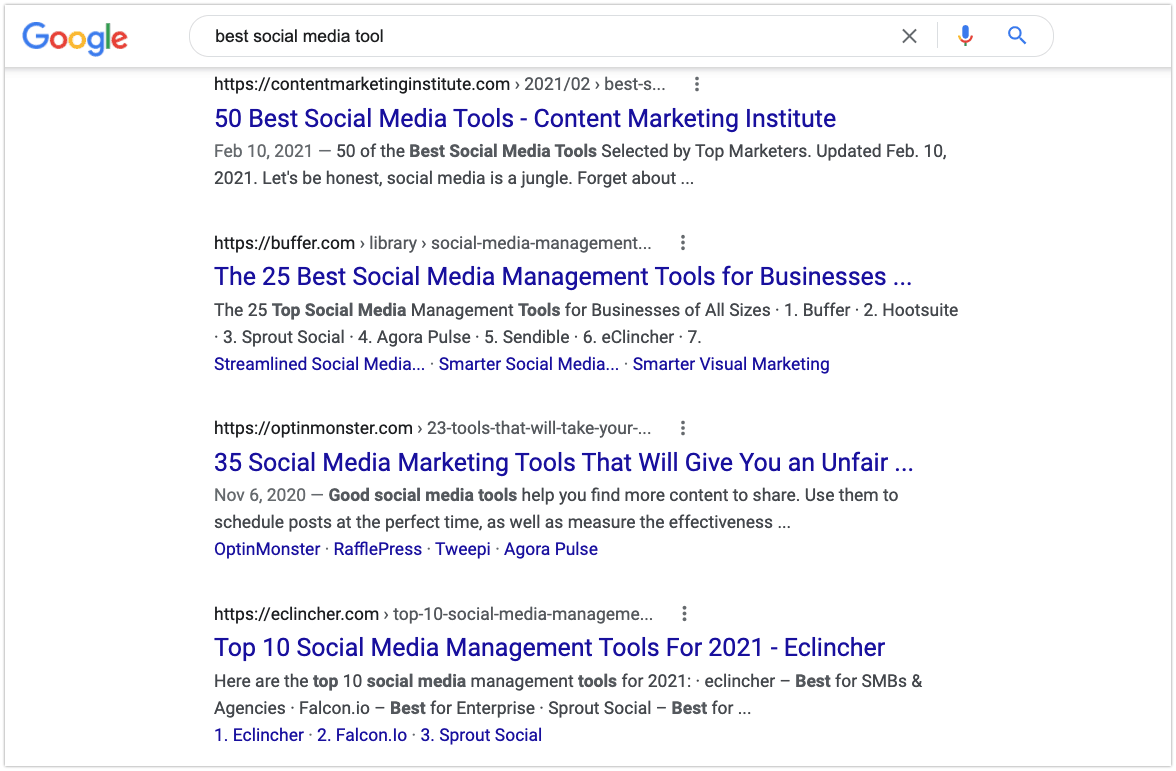
That tells you that an article about just one tool isn’t what people want.
But people might love a huge post comparing 100 different tools.
Method 2: BuzzSumo.
On the other side of the coin, BuzzSumo can help you find what’s doing well on social media.
This is useful even if you aren’t focused on social.
After all, an engaging angle, structure and headline are always important — regardless of your distribution strategy.
And BuzzSumo can quickly show you how those aspects are translating into shares for recent articles and videos. Making it one of the best ways to come up with content ideas.
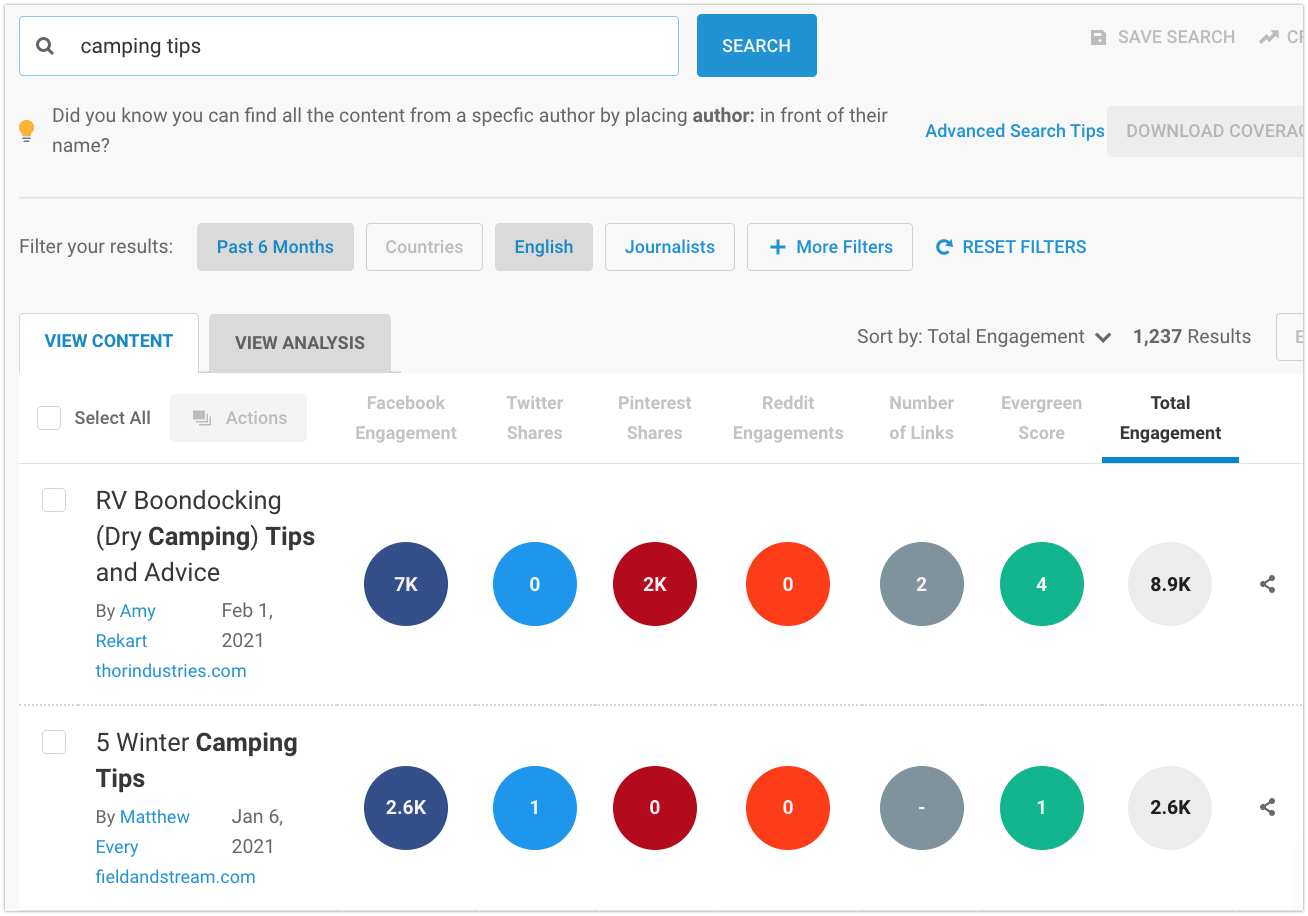
To use it:
Go to BuzzSumo.com, type in your topic and hit “search”.
BuzzSumo will show you the relevant content it finds from the past 6 months. Along with how many shares (and backlinks) each piece received.
Method 3: SEO keyword research.
If your main focus is on driving organic search traffic, I recommend using a paid tool like Ahrefs or Semrush to find target keywords.
Why?
SEO content development can be very competitive. And those paid tools are simply more powerful than their free counterparts. So using one maximizes your odds of success.
But if you’re a solo content writer, you may want to go the free route for now.
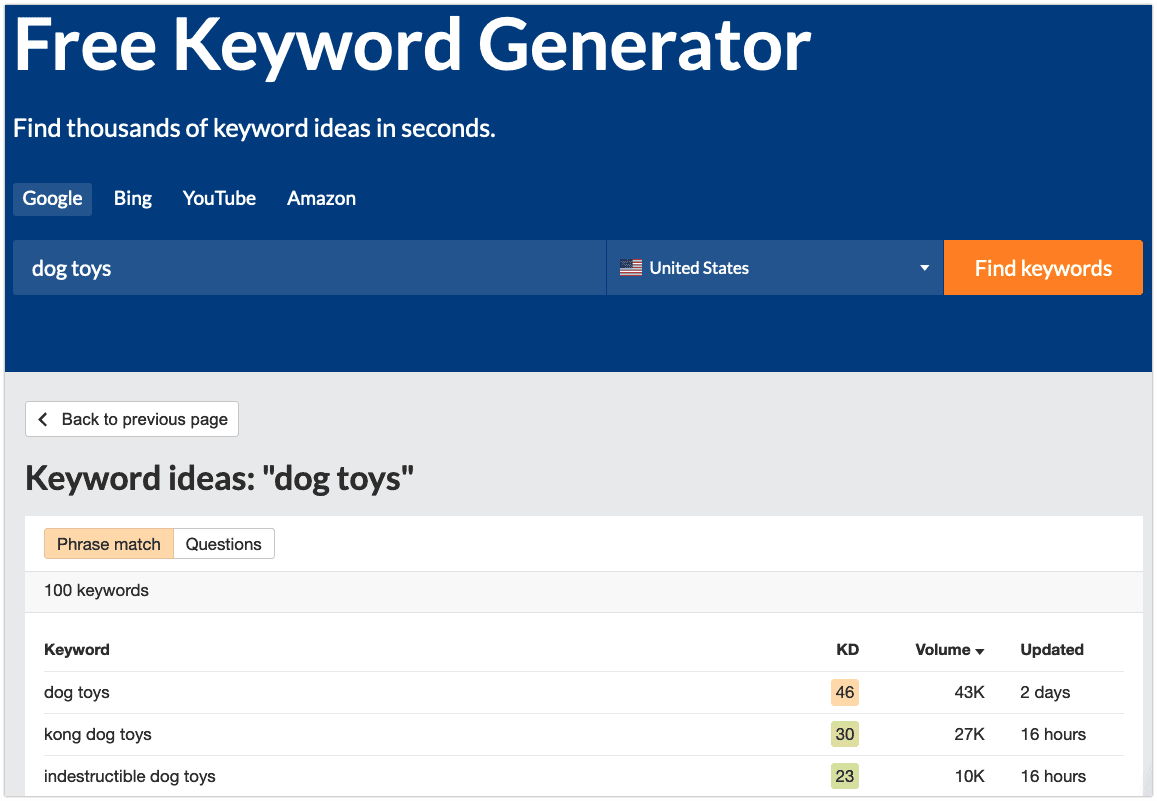
The Ahrefs Free Keyword Generator tool works in a pinch.
Just type in your topic idea and hit “find keywords”. The tool will generate a list of ideas below, along with keyword difficulty scores and monthly search volumes.
There are even tabs for YouTube keywords and Amazon keywords.
Tip: If you’ve never done keyword research before, this guide will help. And for more ideas and examples of what type of blog post to write, see the “blog posts” section of my guide to content marketing types.
Once you know what type of content to create, next you need to determine what exactly to include in it.
Which we’ll cover right now.
3. Create Your Content
Step 1: Make an outline.
The first step in content creation is to make an outline.
Content outlines lead to better first drafts.
Which means less editing later, and higher quality content in the end.
The longer the content will be, the more important it is to outline it first. Whether you’re creating an article, video, podcast, case study, Twitter thread, LinkedIn post or anything else.
Outlines are especially important when you hire a writer to help scale up your content production.
To make your content outline:
Start by listing your major points. Those will become the main sections of your piece.
How do you know what to include?
I like to start my outlines with a “brain dump” of what comes to mind.
Next, I’ll look back at the content examples I found earlier in the research phase. Generally, I aim to make something better and more in-depth than whatever is already out there.
Finally, I’ll Google the topic one last time to see if I forgot to include anything important. If there’s something critical in the top few results that’s missing from my outline, I’ll add it.
Here’s the initial outline I used for my post on content marketing funnels:
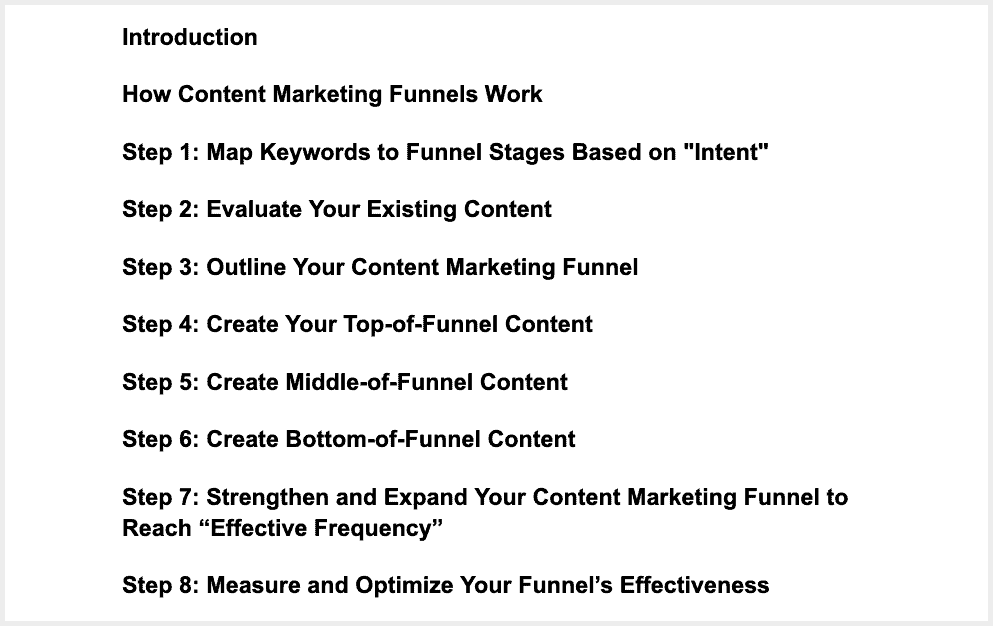
Once you have your main headings, finish your outline by adding sub-points below them. It’s usually best to have about 3-5 sub-points under each heading.
Tip:
In Google, the “people also ask” questions are a goldmine of ideas to use as sub-points.
For example, below are the questions Google displays when you search for “content marketing funnel”.
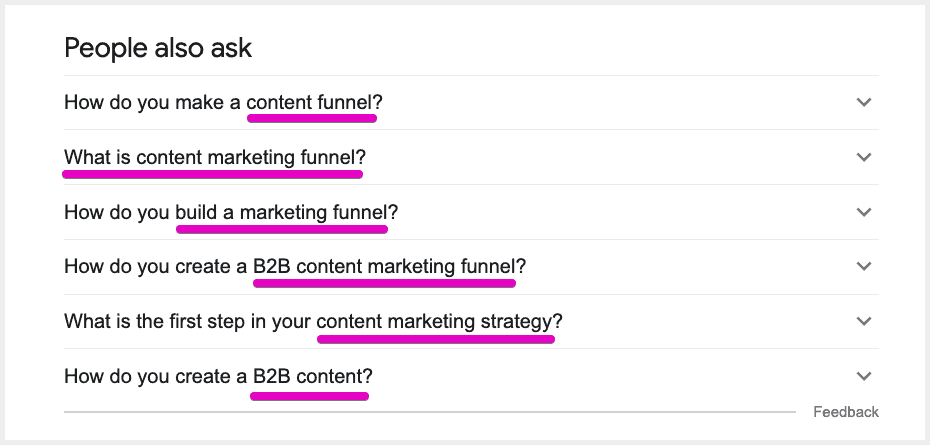
As you can see, the questions include phrases like “what is a content marketing funnel” and “B2B content”.
I included many of those phrases as sub-topics in my final outline and article.
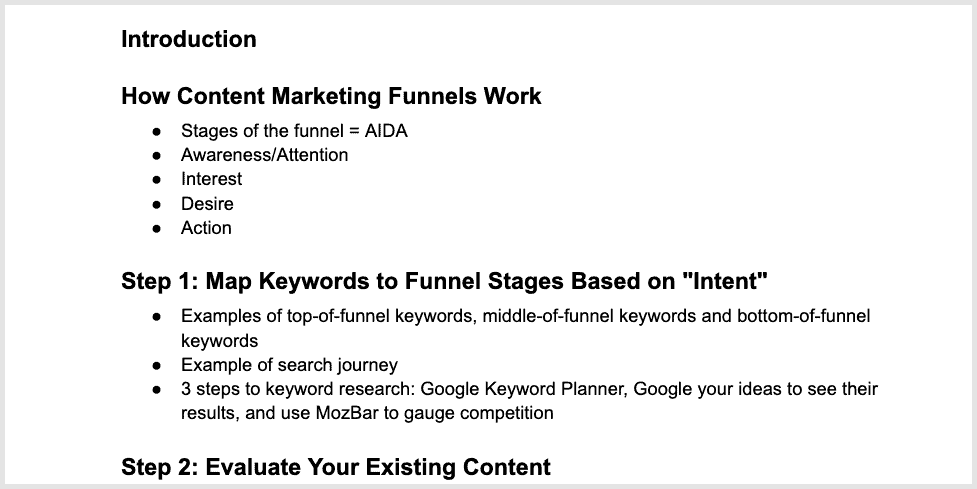
Here’s what my final outline for the article looked like, with 3-5 sub-points under each major heading:
Step 2: Write your content’s headline and introduction.
The headline and introduction of your content are incredibly important. It’s their job to convince people to actually read, watch, or listen to your content.
In fact:
60% of people share content on social media after looking solely at the headline.
A good headline and introduction typically make some kind of promise about what your audience will get from the content.
Whether that’s useful information, an interesting perspective, or just a funny story.
According to the data, high-engagement headlines often:
- Include some kind of number.
- Promise some kind of instruction. Like “you need to” or “how to” or “why you should”.
- Contain about 11 words or 65 characters. (Though for YouTube videos, titles under 50 characters rank best.)
I wouldn’t try to make every headline fit all three of those guidelines. But it’s a good idea to hit one or two of them most of the time.
For your introduction, the most important thing is to keep it short. 3-8 sentences is the sweet spot.
You want people to get to your main content as quickly as possible, since that’s what they’re there for. Otherwise they’ll lose patience and go somewhere else.
To write your introduction, try the PST Formula:
Problem, Solution, Transition.
Here’s how the PST Formula works. And how I used it to write the introduction to my content marketing examples resource:
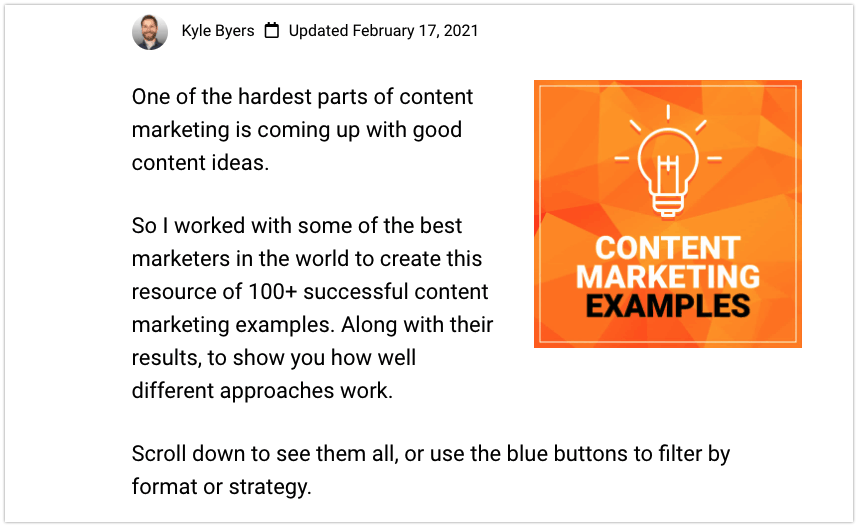
1) Problem: briefly call out the problem or opportunity.
➡ “One of the hardest parts of content marketing is coming up with good ideas.”
2) Solution: describe how your content will solve the problem. (Or help them seize the opportunity.)
➡ “So I worked with some of the best marketers in the world to create this resource of 100+ successful content marketing examples. Along with their results, to see how well different approaches work.”
3) Transition: quickly transition to the main content.
➡ “Scroll down to see them all, or use the buttons to filter by format or strategy.”
Step 3: Write the body of your content.
The body is the main part of your content. It’s also the most valuable part, because it delivers on the promise you made in your headline and intro.
Once you have your content outline with sub-points, writing the body is pretty simple. You just flesh out what you already planned.
The key is not to interrupt your writing flow.
For that reason, there are two things I don’t recommend doing at this stage:
- Don’t edit to perfection as you write. For now, shoot for a decent rough draft. We’ll go back and polish it in a later step.
- Don’t add multimedia yet. Instead, put text placeholders like “[image]”. We’ll go back and fill these in later too.
Step 4: Write your conclusion (and any other missing text).
The conclusion is where you’ll wrap things up.
But more importantly, it’s a great place to prompt people to take action.
You may want them to leave a comment on your blog post, subscribe to your email list, leave a review on your podcast, or “like and subscribe” on YouTube.
Here’s an example conclusion:

You can also write any other text you might need at this point.
That might include the meta title tag, meta description, blog post excerpt, video description or podcast episode description.
(Tip: the Mangools SERP Simulator lets you preview what your meta title tags and meta descriptions will look like.)
Optional: Record your video or audio.
If you’re creating a video or podcast, now’s the time to shoot the video or record the audio.
4. Edit Your Content (and Add Multimedia)
Now it’s time to review, proofread and edit your content. And add any multimedia.
Note:
It’s a good idea to wait at least a day after writing before tackling this step. Otherwise, you’ll be too “close” to your work to be able to see it clearly.
There are a few tools that can make content editing easier.
If you’re bad at proofreading, Grammarly will help you spot grammatical errors.
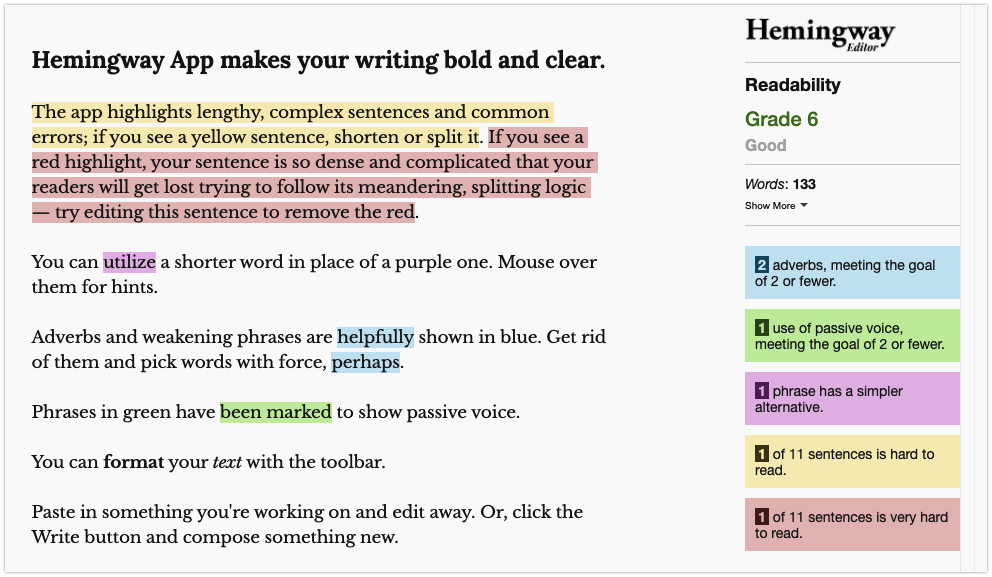
While Hemingway Editor will point out run-on sentences, passive voice, and other stylistic issues.
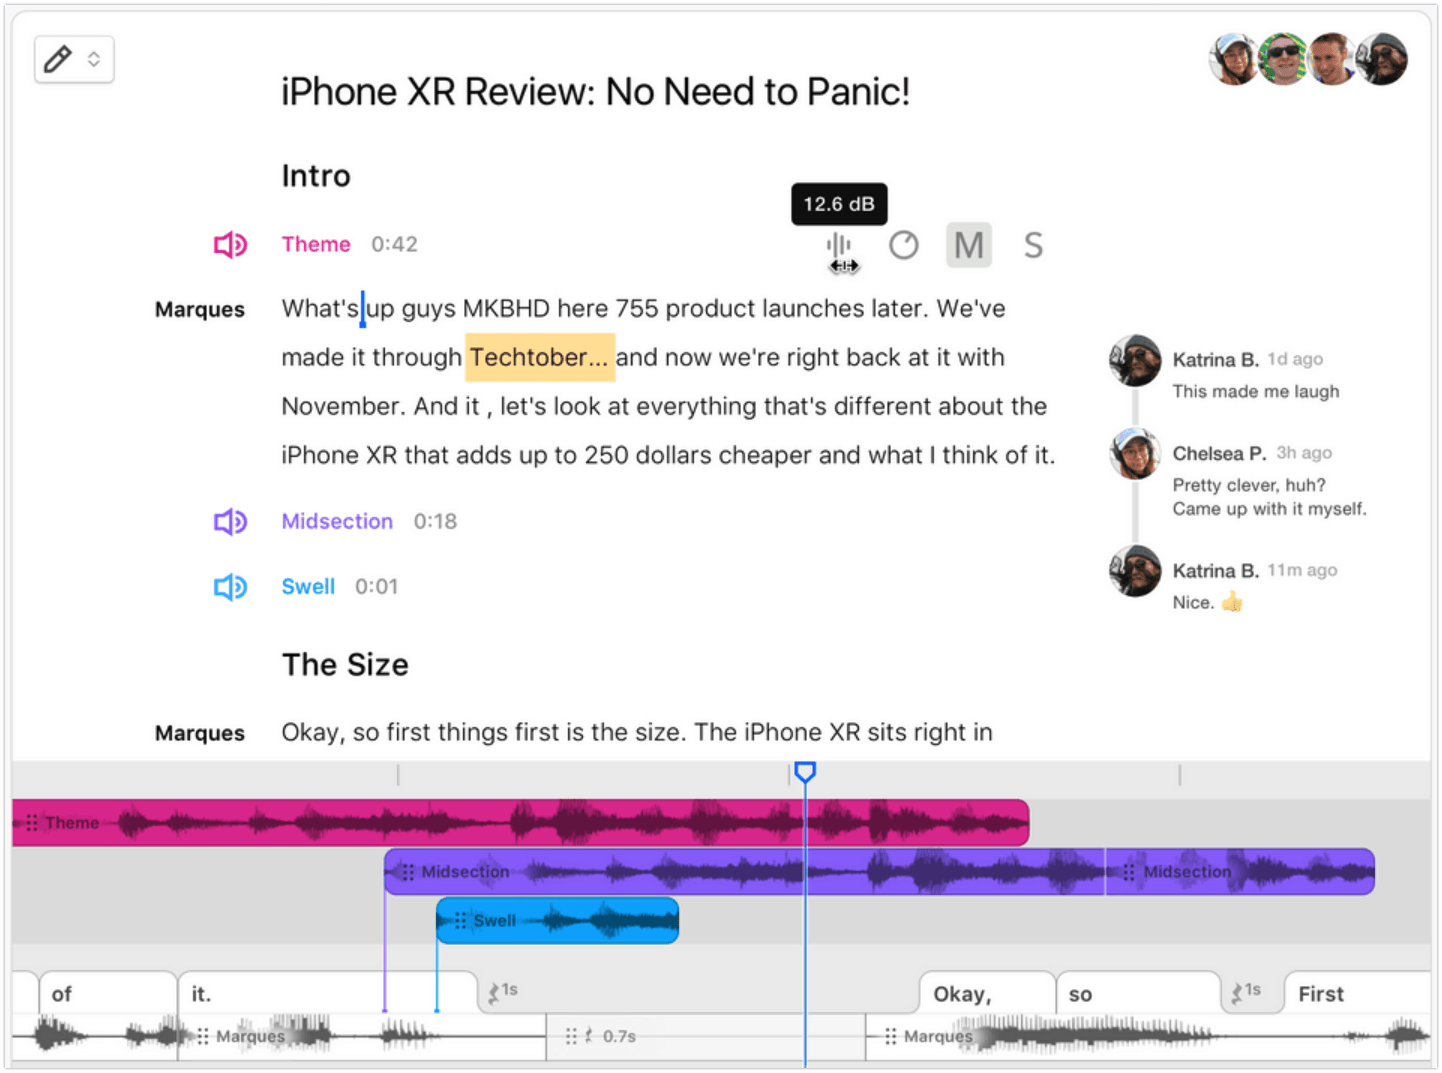
Finally, for audio and video, a cool “doc-based” editing tool is Descript.
Descript lets you delete or add words within the audio transcript, and have those changes applied to the actual audio track.
Regardless of how you edit your content, it’s a good idea to shoot for three things:
- Brevity
- Clarity
- Interest
Those are all related.
Shorter sentences and paragraphs are clearer and easier to understand. While rambling sentences lose people’s interest.
When in doubt, read it out loud.
Does it sound natural? Conversational? Good.
Once you’ve edited your content, you can add any multimedia that you’d like.
Blog posts with images get 94% more views than those without. And embedding video in articles is correlated with stronger results as well.
To add multimedia to your post:
First, look for any placeholders you added in the step above, like “[image]” or “[screenshot]”.
(To quickly find your placeholders, do a ctrl+F or cmd+F for the bracket symbol “[”.)
And replace those placeholders with actual media.
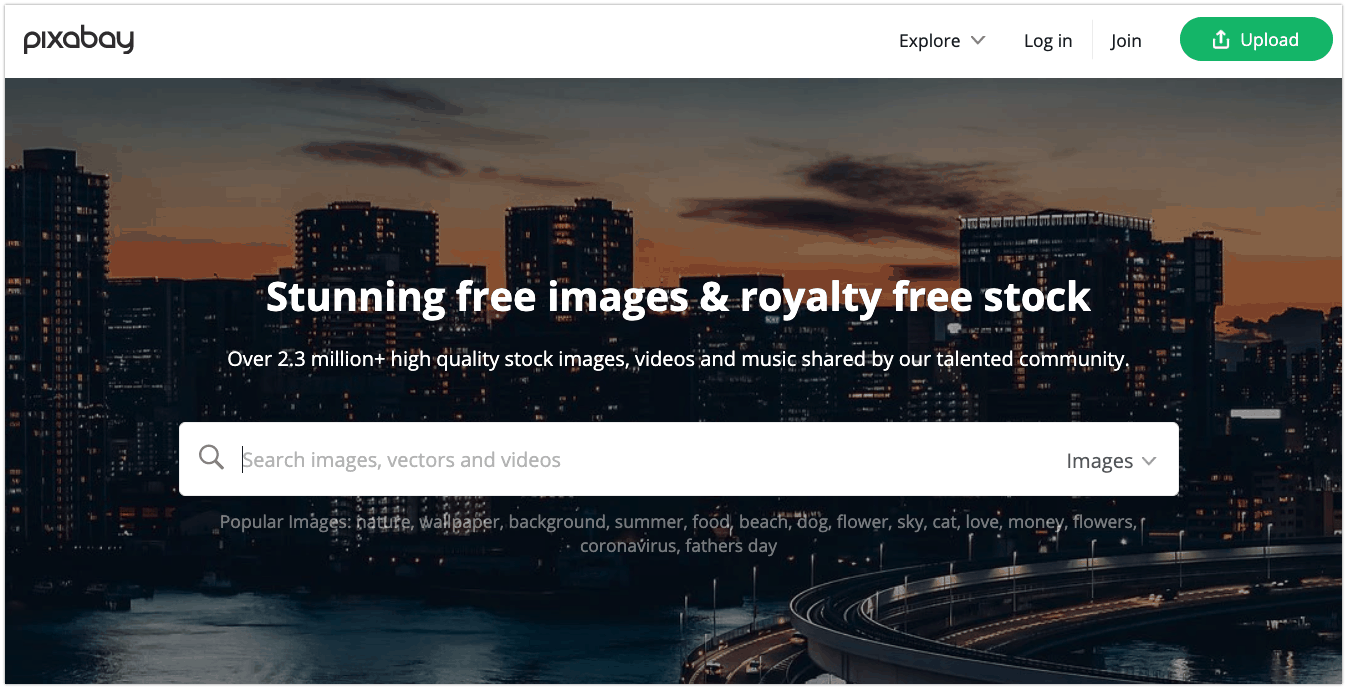
If you don’t have a graphic designer, Canva and PicMonkey are solid image editing tools.
While Pixabay has millions of free stock images and videos you can use.
Next, add any other media you might need.
For example:
- For a blog post, you’ll probably need a main hero image. As well as a 1200 x 628 social media banner.
- For a video or podcast episode, you’ll want a thumbnail image.
Finally, are you creating this content for a client? If so, the last step in your editing process is to get their approval.
5. Publish and Distribute Your Content
Once you’ve edited your content draft, it’s time to publish it.
And then distribute it in any way that fits your content marketing strategy.
Whether that’s promoting it via email, social media channels, push notifications, blog syndication, paid ads, blogger outreach or any other channel.
So this step is more complicated than it sounds at first.
That’s why I use a “publication checklist”.
A publication checklist ensures you won’t miss any critical steps. It includes things like:
- Check title tag and meta description length in Google SERP Simulator
- Draft and preview email to newsletter subscribers
- Schedule email to newsletter subscribers
- Preview social shares via Twitter card validator and Facebook sharing debugger
- Schedule posts to social media
- Add goal deadline to content calendar (to check whether the content met the goal you set for it)
- Add internal links from older content
It’s a good idea to include any content distribution techniques you often use. For example: blogger outreach, setting up retargeting ads, creating a custom lead magnet or content repurposing.
You can quickly create your publishing checklist in a Google Doc or Sheet, or use a project manager like Asana or Notion.
Then, use the same checklist each time you develop new content.
6. Content Post-Mortem Analysis
At the very beginning of these content development steps, you set a “time-bound” goal for the content.
Meaning: you said it should achieve a specific outcome by a certain date.
So when that date arrives, you need to take an honest look at whether your content plan succeeded or failed. And why.
This is one of the most important things a content developer, creator or marketer can do. It’s how you learn and improve.
So whenever I publish a new piece of content, I always mark a date on my editorial calendar to look at how well it did.
When that date arises, here are a few ways you can analyze your content’s performance:
#1: Use Google Analytics to see on-site conversions and traffic.
On GrowthBadger, the main point of my blog posts is to bring in more email subscribers.
So I have a goal set up in Google Analytics that registers each new subscription as a conversion.
That way, I can use the Landing Pages report in Google Analytics to see exactly how many subscribers I’m getting from each piece of content on my site:
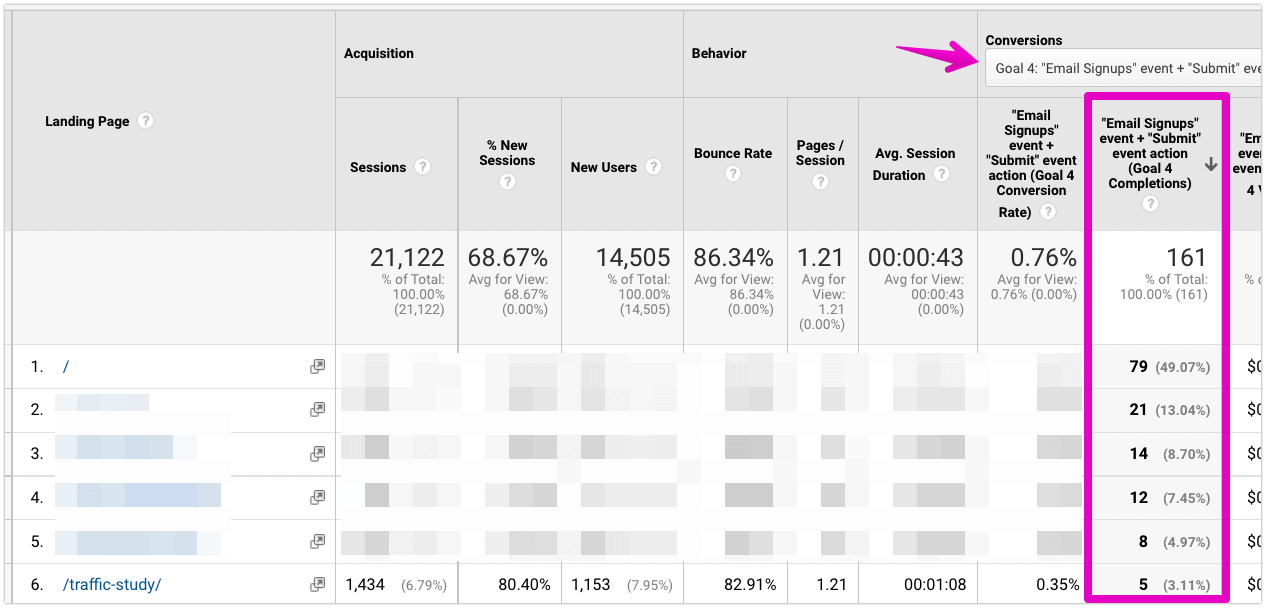
You can do the same for user signups, sales leads, product purchases or anything else.
First, follow Google’s instructions to set up goals for your site if you haven’t already.
Then in the left-hand menu of Google Analytics, go to Behavior >> Site Content >> Landing Pages.
The same report will also show you how much traffic each piece of content is getting.
#2: Google Search Console for organic search rankings and backlinks.
If your content goal includes search engine optimization metrics like search traffic, Google rankings or backlinks, you can see that data in Google Search Console for free.
To see your rankings in Google Search Console, first click “Performance” on the left.
Then select the “Average CTR” and “Average position” metrics above the chart. That will add them as columns to the report below.
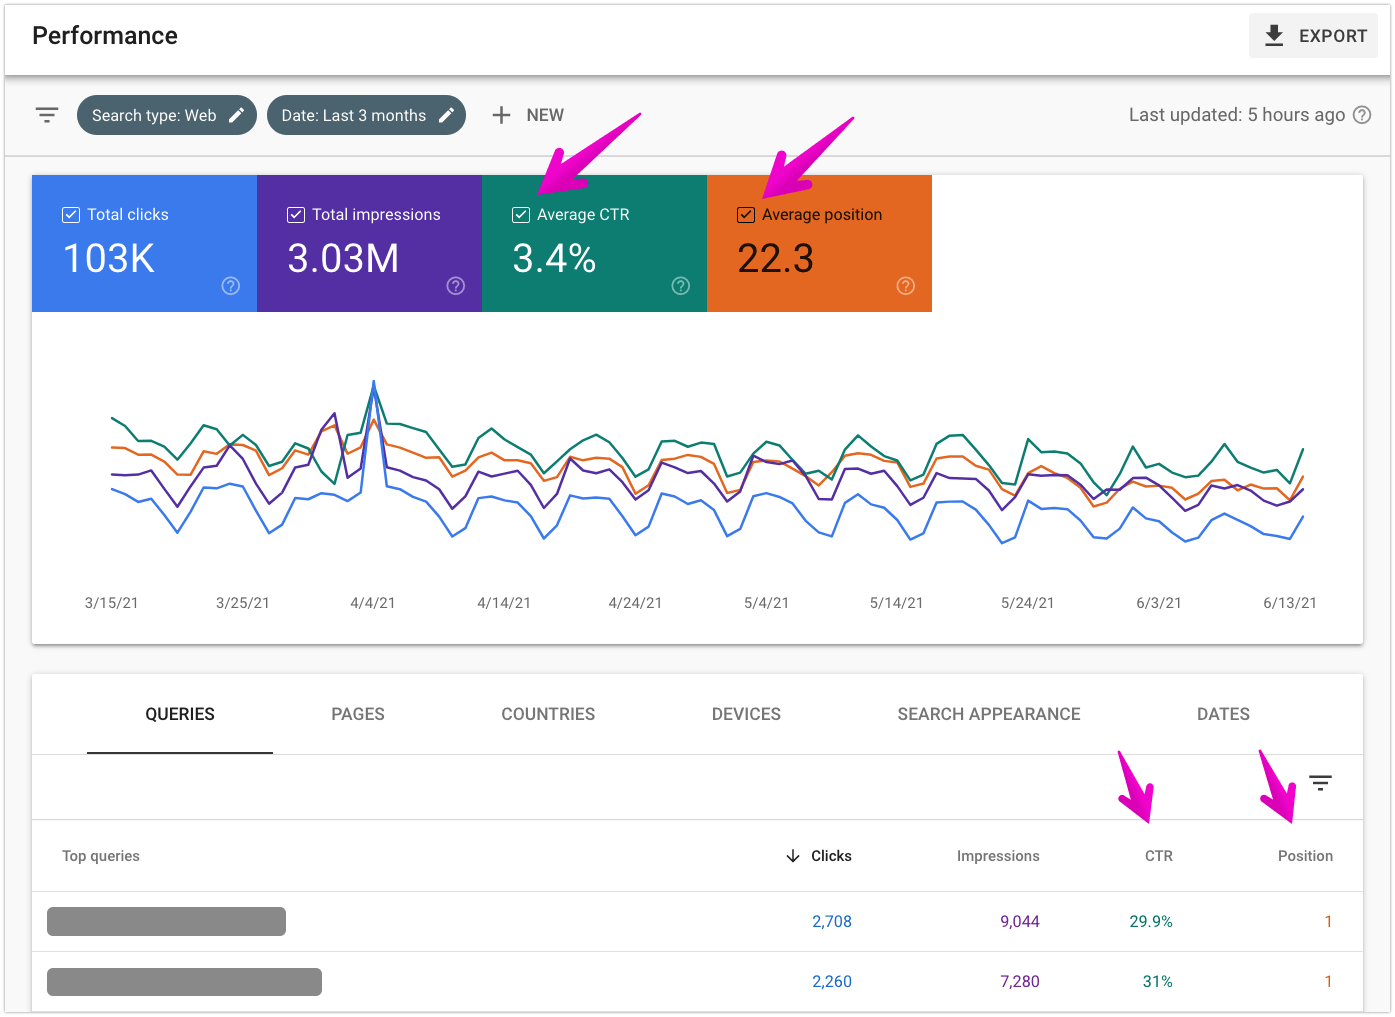
You can also change the focus of the Performance report.
By default it will display your data for each query (keyword). To see data by page instead, just click on the “PAGES” tab below the chart.
Like I said, Google Search Console includes basic reporting on backlinks too. (Though if you have access to a paid tool like Ahrefs, Semrush or Mangools, those will give you more in-depth information.)
To see your backlinks in Google Search Console, click on “Links” toward the bottom of the left-hand menu.
Then under “Top linked pages”, click on MORE.
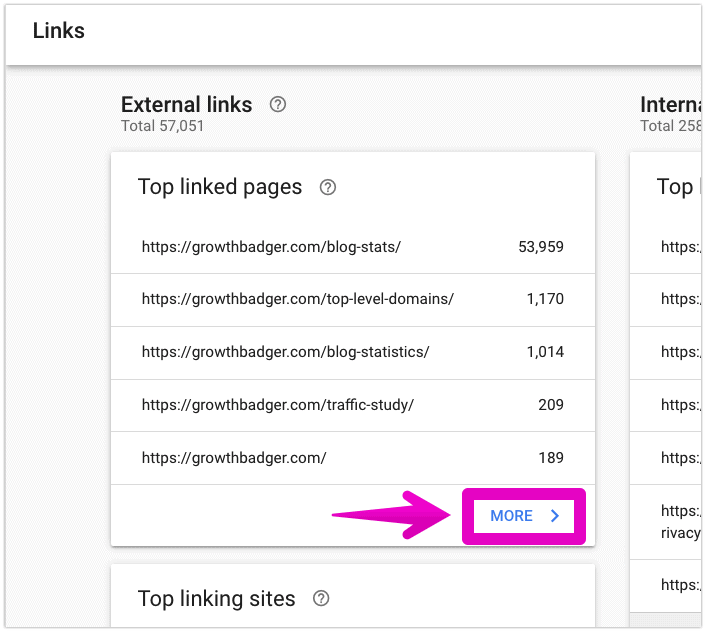
That will show you a breakdown of how many backlinks each page on your site has. And from how many different external websites.
#3: SharedCount for social shares.
To see how many social shares your content has gotten, check out SharedCount.
Just plug in your content’s URL and hit go.
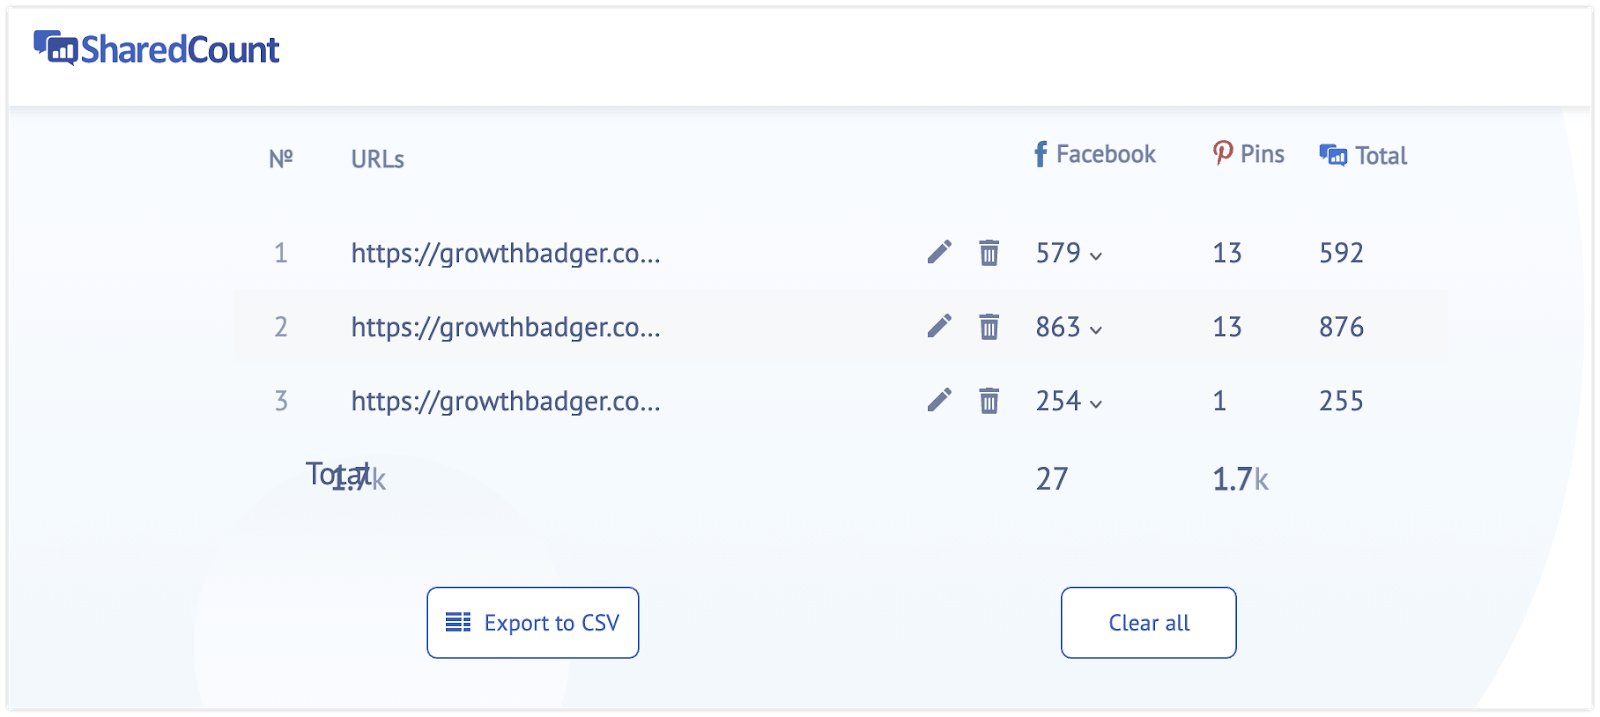
Note: SharedCount only looks at Facebook and Pinterest. So it’s not perfect. But it’s great for a quick check. (And it’s free.)
7. Improve Your Content Over Time
Now you’ve measured your content against its goals.
If it’s achieving its goals, give yourself a pat on the back.
If it isn’t working as intended, now it’s time to fix it.
For example:
Not getting enough lead form conversions? Try changing the call to action. Or targeting a keyword closer to the bottom of your sales funnel.
Not getting enough backlinks? Try using the Double Survey Technique.
You may also find that you need a completely new approach. If your content just isn’t doing anywhere near what you wanted, you may need to start from scratch with a new piece.
But even if your content is reaching its goals, there’s always room for improvement. My guide to content optimization covers dozens of strategies for making your content perform better.
Personally, I care a lot about search traffic.
So here’s one thing I always do:
A month or two after publishing a new blog post, I circle back to check Google Search Console for low-hanging fruit.
I look for keywords that aren’t included in the content — but that are bringing in Google traffic anyway.
Usually you can get even more traffic from those keywords simply by actually adding them to the content.
Here’s how to do it:
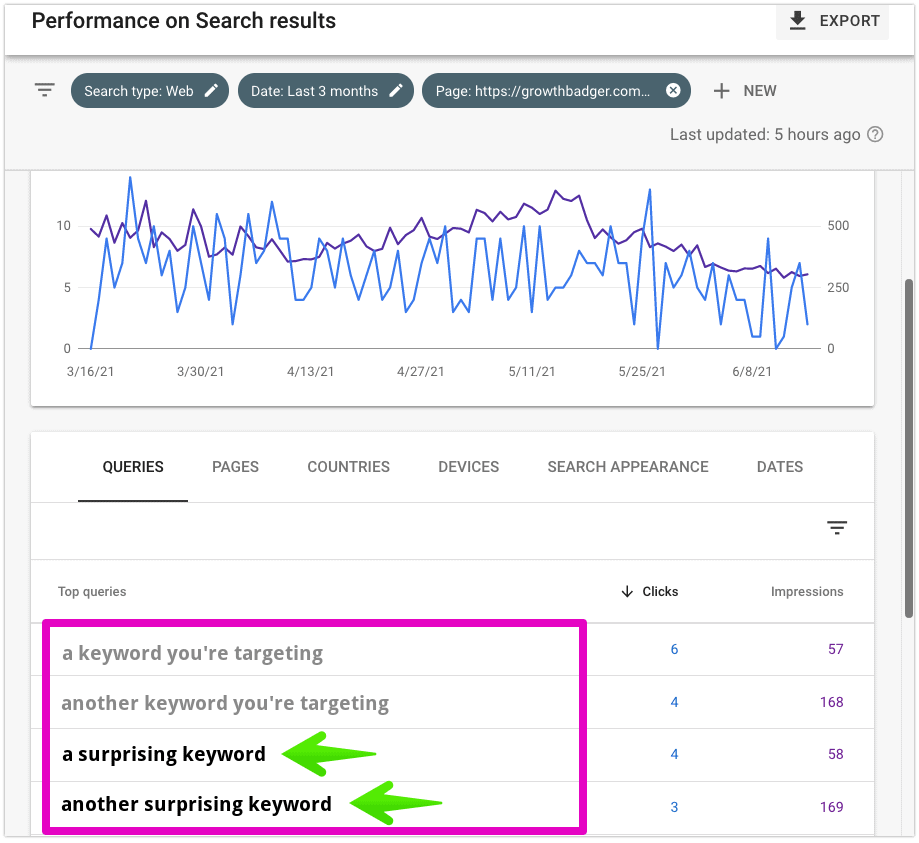
In Google Search Console, go to “Search results” in the left-hand menu.
Then click the “PAGES” tab below, and select the piece of content you want to improve.
Finally, click the “QUERIES” tab and look for anything surprising. If you see any keywords getting traction that aren’t in your article, update the article to include them.
One final note.
Most content eventually goes out of date.
Approaches and technologies change. Dates need to be updated. And competitors raise the bar on how good your content must be to compete.
So it’s not enough to tweak your content once.
Instead, it’s best to take time each year to review and update every major piece of content.
That’s the best way to make sure it keeps producing results for your business.
Conclusion
That wraps up this guide to content development.
Now I’d love to hear from you.
What did you think of this process? Did it cover anything that was missing from your approach?
Maybe you weren’t using a specific framework for writing introductions.
Or maybe you don’t always set S.M.A.R.T. goals for your content.
Let me know in a comment below.
Wow Kyle, what a great guide! I’ve been doing content marketing for a while but you still managed to teach me some new tricks.
I love the PST formula for introductions, and will definitely use it in my next blog post. I’m also going to look for low hanging fruit in Google’s search console to get more SEO traffic to my older posts. Thanks for the ideas 😀